Chapter 6 Template Management
Template Management
Template management includes all portal templates and page templates.
Portal Template
Users can set their configured portal as a template. When creating a new portal next time, they can directly select the pre-configured portal.
Page Template
Users can set a configured page as a template. When configuring a new page for the portal, they can directly select an existing page template.
The following explains how to:
- Set a configured portal or page as a template.
- Use portal templates and page templates.
6.1 Portal Template
Using Portal Templates
1. Set a Portal as a Template
- Enter the portal management backend. In the portal list, hover over a portal to reveal the portal operation buttons, then click "Set as Template."
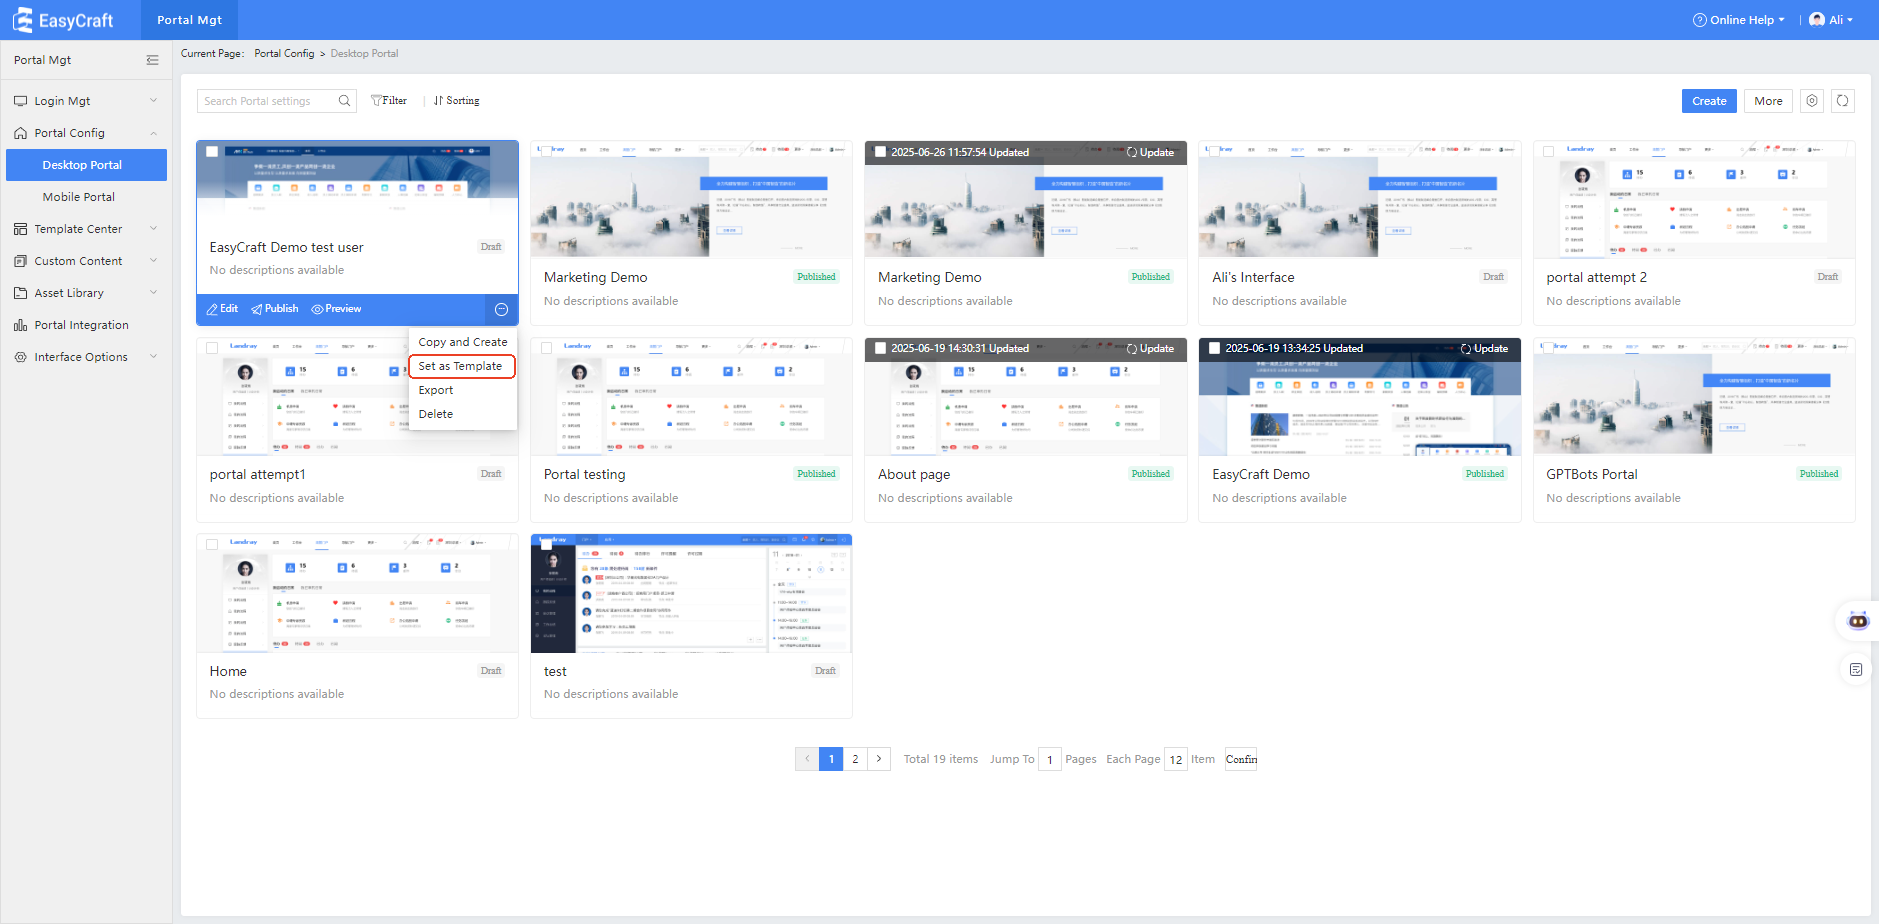
-
In the "Set as Template" pop-up window, edit the portal template name and description. After clicking "OK", a success message will appear.
-
Enter the "Template Management" menu to view the list of portals set as templates.
-
In the template management list, you can:
- Preview portal templates
- Create new portals using portal templates
- Modify basic information of portal templates
- Delete portal templates
2. Use a Portal Template
-
Go to the "Portal Configuration" list, click "Create New Portal", select a portal template, and apply the template.
-
Edit the basic information of the new portal and click "Confirm."
💡 Tip: Modifying the basic information here will not affect the original portal template.
-
Enter the editing page of the new portal to edit the portal content.
💡 Tip: Editing the content here will not affect the template itself.
6.2 Page Template
Using Page Templates
1. Set a Page as a Template
-
Edit a portal, enter the portal editing page, and in the page management area, click the
"..."operation button next to the page name, then select "Set as Template." -
In the "Set as Template" pop-up window, edit the page template name and description, upload a cover image, and click "Confirm."
A success message will be displayed. -
Exit the portal editing page, go to the "Template Management" menu, select "Page Template," and you will see the page that was just set as a template.
-
In the Template Management > Page Template list, you can:
- Preview page templates
- Modify basic information of page templates
- Delete page templates
2. Use a Page Template
-
Go to the "Portal Configuration" list, edit the portal, create a new page in the page management section, then click "Edit Page."
-
Select the "Page Template" tab, choose the recently added page template, and click "Use."
-
Enter the page content editing interface.
💡 Tip: The content is inherited from the page template, but editing it here will not affect the original template.
6.3 Page Master
Using Master Pages
A Master Page can be associated with multiple portal pages, allowing shared content across portals, reducing later maintenance and operational costs.
1. Create a Master Page
-
Go to Portal Management Backend → Template Center → Page Master directory.
-
Click the "New" button, enter the Master title, and proceed to the layout selection page.
💡 Tip: Just like creating a new page, you can also select a Page Template here.
-
After selecting a layout, enter the Master Page editing interface, configure the content, then click Save and Publish.
💡 Tip: Only published masters can be used in portal pages.
2. Use a Master Page
-
In the Portal Configuration, create a new page, then click the "Edit Page" button.
-
Select the "Page Master" tab and choose a published master from the list.
-
The page will now inherit content from the master and cannot be edited directly.
💡 Tip: Pages referencing masters are read-only; to change their content, edit the master page directly.
3. Edit a Master Page
-
Go to Template Center → Page Masters, and click the "Edit" button next to a master.
-
Modify the master content as needed, then Save and Publish.
💡 Tip: After publishing, all child pages linked to this master will reflect the changes automatically.
4. Delete a Master Page
- Navigate to the Master Management list, hover over the master to reveal operation buttons.
- Click "Delete Mast
6.4 Component Templates
- During page editing, select component appearance to set it as a component template. Template names are auto-filled and cannot be duplicated.
- After successfully setting as template, it will appear in the left-side component templates tab. Under Template Center - Component Templates directory, view template lists for management tasks like renaming templates, editing descriptions, or deleting templates.